sitemap
Altering an MD3 skin-path - by Tabun
Altering a skin-path using Npherno's MD3 Compiler
A simple tutorial by Tabun
What you need:
What's this about?
This tutorial gets you acquainted with the useful and concise tool titled 'Npherno's MD3 Compiler', which can be used to
alter models for Q3/ET based games and mods. More specifically, it shows you exactly how to set or change a skin-path.
Skin-paths are stored in the MD3's themselves. When the game loads a model, it uses the embedded path to load the proper shader or texture.
Altering MD3's can be tricky at first, but it's rather easy and doesn't take more than half a minute at most.
Step 1: Importing objects
Launch the MD3 Compiler. It's the "MD3Compile.exe" file.
This is what you'll see:
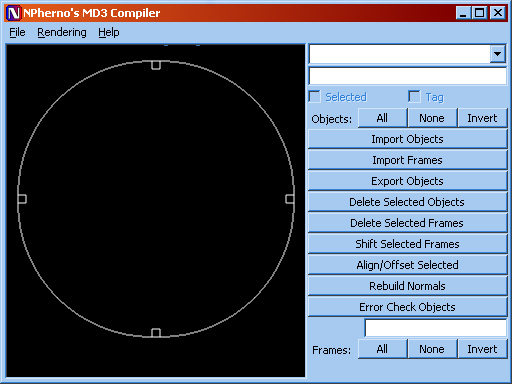
fig.01 - Npherno's MD3 Compiler
Now, click the button labeled "Import objects", and select the MD3 you wish to alter.
It shows the following popup:
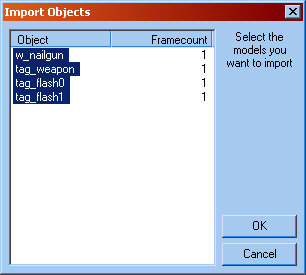
fig.02 - Importing an MD3
Select all parts of the model, and click "OK".
The model should now appear in the center as a red and blue set of objects.
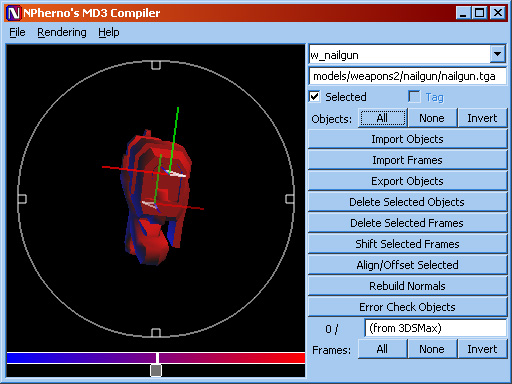
fig.03 - Imported model
The window should look something like fig. 03.
This is important:
Now, click the "All" button (located directly above "Import objects").
Make sure the checkbox in fig. 04 is checked before you proceed!
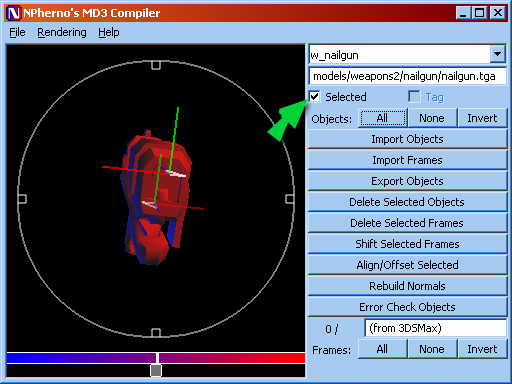
fig.04 - After clicking "All"
Step 2: Altering the skin-path
Now we can alter the skin-path of any of the imported objects.
Usually, you'll find the MD3 only has one object. If you've had to select more than one
object in the import popup (see fig. 02), there are more objects whose path may need editing.
Use the top-most dropdown-list to select an object (in this case, we can see that w_nailgun has been selected).
The embedded path to the skin will be shown in the field immediately below it. You can edit the path now.
This is important:
Remember to always use forward slashes in paths. No matter what the original path shows, use forward slashes.
failure to do so means you won't see a skin in-game.
Step 3: A precaution
To prevent problems with the MD3's normals (don't ask if you don't know or care), click "Rebuild normals" and "OK" after
the popup opens. No need to select any of the three checkboxes.
(Depending on the state of the MD3 you've imported, the results can either show or fail to show in the compiler's view of the model.
Don't pay it any heed, unless you're specifically trying to fix a broken model.)
Step 4: Final step
Once you've edited the paths of all objects, it's time to export the model, saving your changes.
Click "Export objects" and give the MD3 a nice name. You can overwrite the MD3 you imported without problems, by the way.
A popup will show, asking for an "Internal name". Unless you're editing a player model, ignore this - leave it blank.
Just click "OK".
That's all there is to it.
Recap
Ok, to recap what I've shown so far, here are the basic steps:
- 1. Import objects
- 2. Alter name (remember, FORWARD slashes)
- 3. Rebuild normals
- 4. Export objects
That's it. Hope it made some sense to you.
Greets,
Tab.